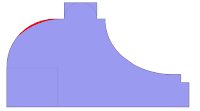
The holidays are coming up. I am (was) conveniently making a few picture frames as gifts. The presents are technically what's inside the frame, but those subjects are not the purpose of these posts.
I am often asked what pair of hollows and rounds a woodworker should start with. The answer, like most things, is that "it depends." I imagine that the 4s, 6s and 8swill have their place in everybody's work (radii of 4/16, 6/16 and 8/16, respectively). This advise, of course, doesn't help somebody that's looking for only one pair.
My recommendation for getting started is as follows: if you want one pair of hollows and rounds then pick an ogee that you like and I'll help you pick a pair to make it. (Fortunately, that same pair will likely fit into your shop well.)
These 30 profiles were all made with the same two planes, a single pair of 6s.
If, however, you have the option, then get two pairs. With a second pair you will be able to make much more than twice as much than what is photographed above. You'll be able to make exponentially more profiles, in fact. You will be able to make all of the same profiles above, but in varying sizes.
These four ogees are geometrically similar: each consists of two circle segments that are 60 degrees of an arc. Each profile is 30 degrees from horizontal. From left to right, they were made with a pair of 10s, 6s, 4s and 2s.
With a second pair, you will also be able to mix and match the hollows of one size with the rounds of your other to make profiles more representative of what you see in period work.
The profile above is 90 degrees of a 1/4" convex radius and 60 degrees of a 3/8" convex.
Additionally, you'll be able to introduce ovular shapes by using two rounds or two hollows together, which is actually the subject of this post.
The large cove of the profile on the left of each of these pictures was made with a single round and is a circle segment. The profile on the right was made with two rounds and is more elliptical.
It is at this stage, having multiple sizes, that you will truly be able to recognize the versatility that these planes both allow and encourage. Get the 4s and 8s or the 6s and 10s and you'll be able to make scores of complimentary profiles. (Will you want 5s or 16s next? Rest assured that you will know.)
With ovular shapes, all planes are still being guided by the rabbets and chamfers previously touched upon. Steering them is not freehand, but at times it will feel like it is if you do not have a proper strategy.
Take note that the Ovolo on the left and Cove on the right are each made with multiple planes, mimicking an elliptical shape.
Rabbets and chamfers will guide these planes in that same manner we have touched upon before.
Separate the transition points of each plane's future profile with the vertex of a rabbet (Round to hollow, hollow to round, round to round, etc.).
Then create the guide for each round with a rabbet whose vertices approximate the angle of the following cove. (Take note of the dimensions of the rabbets guiding the rounds in the second picture above.)
#6 round followed by #10 round
-Or-
Do you see how the rabbets are actually guiding the round?
#6 hollow followed by #10 hollow
Finally use a rabbet plane for the chamfer followed by #2 hollow.
Look at the result 1-2 passes from completion below.
These picture frame profiles often look a little weird to my eyes (see above). Once they're mitered they are pretty complimentary (see below).
Ovular shapes are seemingly more difficult to lay out at first because it is not always obvious where the necessary guiding rabbets belong. The process is not apparently straight forward. Try a couple picture frames like this and you'll know your error(s) about 20% of the way through. Ultimately, know that you don't need perfect results with either your practice pieces/Christmas presents because you'll be getting socks or Tabasco Sauce in return, which is ideal.
Note: a profile like this is worked from both sides. You'll need straight grain or a scraper.
Just think about the following: How do the rabbets act as depth gauges? How do the planes, themselves, act as depth gauges?


Matt, I really love this profile. Two questions, how wide is the entire piece of stock? and two, how wide is the green rabbit?
ReplyDeleteP.
Sorry I missed this comment before.
DeleteThe entire piece is 1 5/16" wide and the green rabbet is 3/8" wide.
Matt
ทดลองสล็อต pg เล่นฟรีทุกค่าย PG SLOT รองรับเล่นผ่านมือถือทุกระบบ ไม่ว่าจะเป็น IOS และก็ Android ผู้ใช้สามารถเล่นได้ในทุกเกมแบบไม่ต้องสมัครก่อนใครที่เว็บ PG-SLOT.GAME
ReplyDelete