


Hollows and rounds cut 60 degrees of a circle. Snipes bill planes cut nearly 90 degrees, and a different portion.

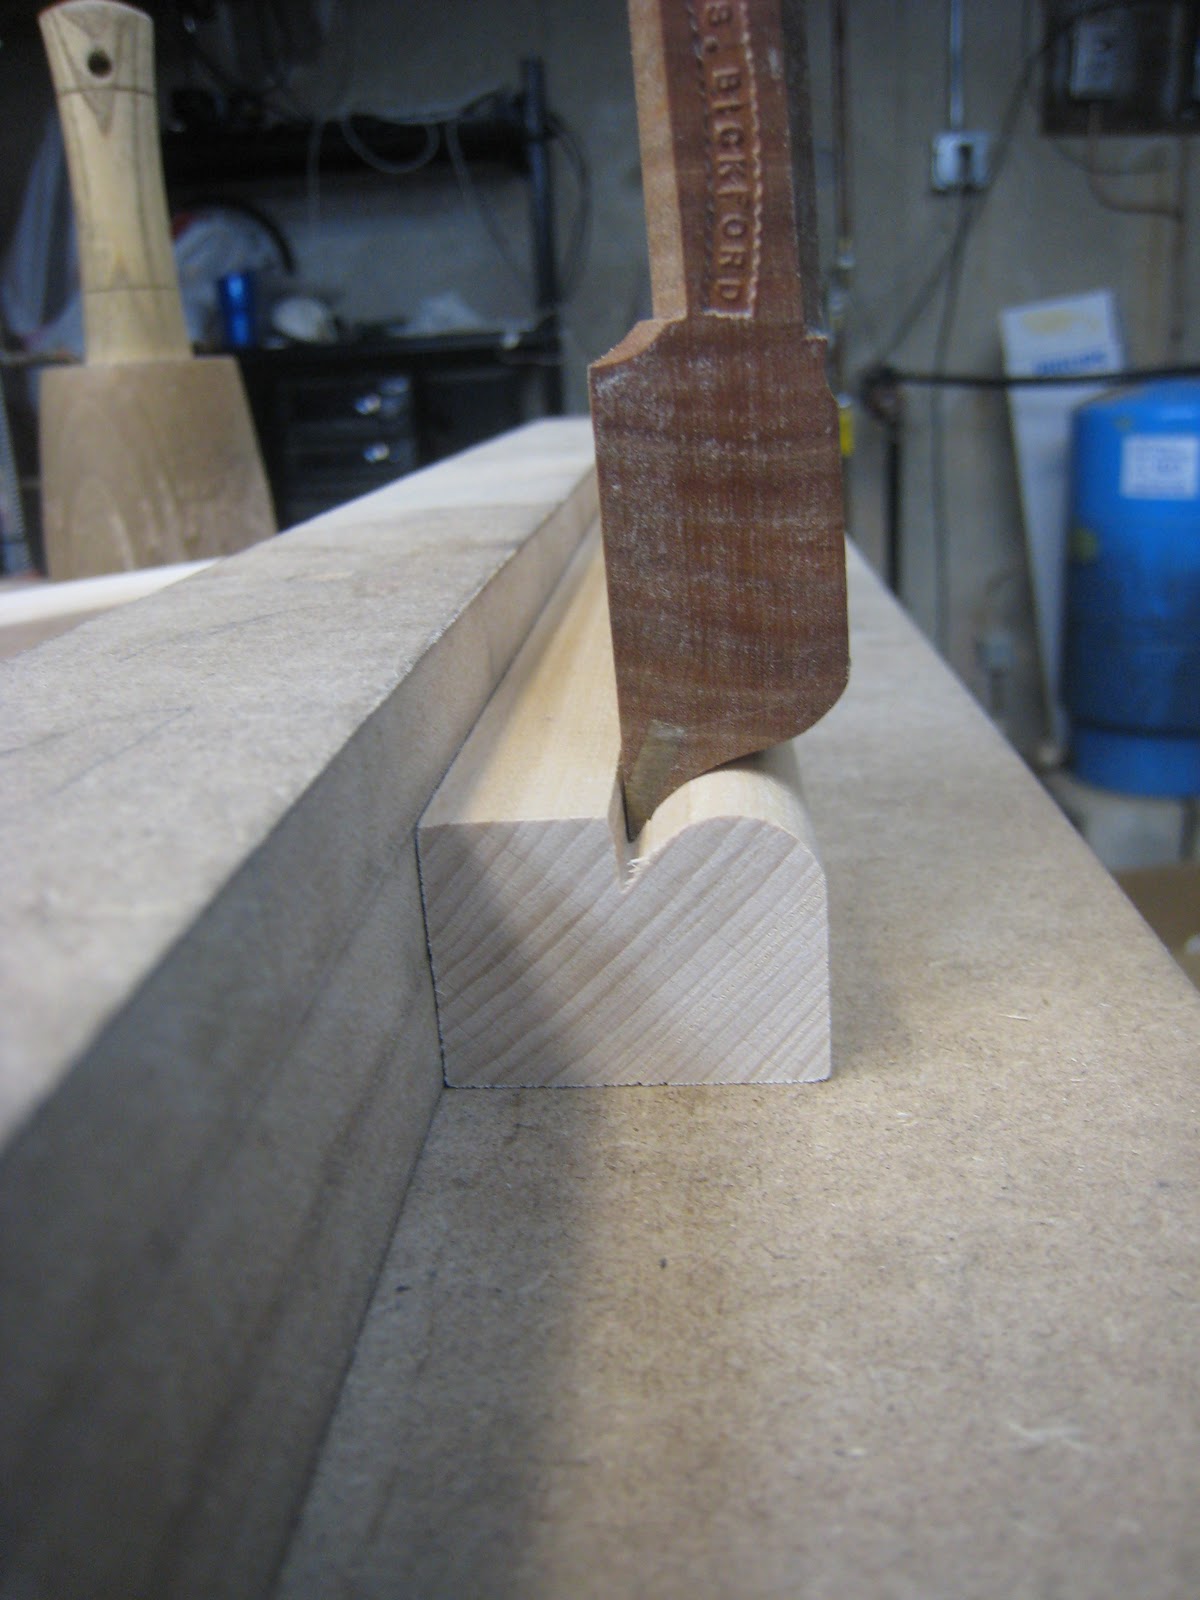
Much of the time I only use the tip of the plane (red) to inset a quirk, but a full width shaving can certainly be taken (red and green).

Let's look at a few examples of quirks being inset.


A hollow just won't reach in some cases. Additionally, a hollow is designed to cut the circumference of a circle where as a snipes bill is designed to cut both the circumference and the adjoining fillet.
Do you need various sized snipes bills like you need various sized hollows? The answer is probably not, unless your work is very specific. You certainly will not need as many. I have never desired one larger or smaller than the standard size that I offer, which cuts a 5/8" radius circle.
The single size is not at all limiting. The side bead above is 3/4" diameter, below is 1/2" and 1/8".


Sometimes the snipes bill plane has nothing to do with the profile. Look again at these two


I know what you're thinking now. "If the profile isn't necessary, just the ability to inset a vertical quirk, What else can it do?" Due to the significant research at Clark & Williams we have been reintroduced to a wonderfully easy way of starting rabbets in square and non-square stock. One of the added extra advantages of snipes bill planes is that they introduce an easy method for starting rabbets in square stock. The plane stays in the gauge line with almost no effort while starting to define the fillet for the rabbet to follow.
I believe Don McConnell of Old Street Tool, Inc. demonstrates starting a rabbet in non-square stock in Traditional Molding Techniques: Cornice Molding. Snipes bill planes excel here.


Using only a rabbet plane in this situation is very difficult because the rabbets are often inset far enough that you can't use your fingers as a fence. Moving fillisters, plow planes and fastening a batten down here will not work.
Is a pair of snipes bill planes necessary? After all the new ones are expensive and the old ones can't be found. They're only necessary if you like what you see above: profiles being next to profiles, quirks, shadows and working with non square stock.
----------------------
And here's the handle of my nephew's new Harry Potter wand. The story says that he has the feather of a phoenix in his wand...so I'm told.


It's the first time I carved anything in the round. I was pretty excited that I didn't stab myself with a gouge while I was setting it in; the futures in Vegas were trading pretty high.
My middle son, Thaddeus, thinks it looks like his electric toothbrush.
Oh man you do some nice stuff!
ReplyDeleteMatt,
ReplyDeleteI just want to tell you how much I appreciate your blog. After years of frustration and then limited success with molding planes after watching Don's video, I feel like you have given me both the secret password and secret handshake to unlock the key to molding plane success.
Thanks!
Ken
Matt,
ReplyDeleteThank you for all your time. I have learned more about using moulding planes in the last few days than over the past 30 years.
Gary
Gary, Ken,
ReplyDeleteThanks for reading. Thank you for the compliments.
If you like the blog tell somebody about it.
If it helps, show me the results when you complete you next project. We'll play follow the leader.
Matt
Matt
Matt,
ReplyDeleteCould you possibly post some of the dimensions for the Snipes Bill for those of us who might be ambitious enough to try to build one?
You have definately infected me with the desire to build a half set and eventually a full set of hollows/rounds and other supporting planes like the sipes bill and rabbet planes.
Kurt,
ReplyDeleteMy standard size cuts a 5/8" radius circle. The outline on my website is indicative of what I send.
Matt
Matt, thanks to you I completed my first cove moulding last night. I was excited. I did a couple of things wrong, but I learned what to do next time. Thanks for the great information on your site. Elmer
ReplyDeleteElmer,
ReplyDeleteSEND A PICTURE!
The beauty of these tools is that you will likely, as you pointed out, know exactly what you did incorrectly once you are complete. It's just a matter of trying.
Thanks for reading.
Matt
Very rare to see information so clear and explicit on using moulding planes.
ReplyDeleteMatt,
ReplyDeleteIt seems like every single time I’m looking for an answer or a clue to ideas I have, I’m trying to better conceptualize a process, or even something obscure; that searches almost inevitably end up at your doorstep. Thank you for all of your efforts and I’m particularly grateful that the Lord blessed you with the gifts necessary to be a very clear teacher/descriptor. Those men are increasingly difficult to find; regardless of the field. That’s especially true in the sphere of the succinctly written knowledge. It’s really strange how there’s not any videos I can find from anyone demonstrating SB’s use (outside of 30 sec ones). BTW: I have found yet another use for SB’s. I had a friend over while I was working in the shop. As it happened, I was laying out and cutting some sliding dovetails and dadoes for a dutch tool chest. He asked to learn/have a go, but has zero experience with doing these hand cut. So I layed out everything with my batten method, when it dawned on me whilst describing how we could set in a knife wall by chipping out along the scribed line, that I could take the lightest of passes with a SB on the scrap piece he was trying to cut the pins into for a sliding dovetail. It at once made the perfect quirk for him to register the saw in and he was off to the races. Now obviously, SB aren’t meant for cross grain use, but this is in air dried white pine and worked wonderfully for a quick first time down and dirty chance to spend some quality time with a friend. I still don’t have the H&R’s I want, but my SB’s have certainly given long legs to the frankenstein collection of planes I do have and they were the catalyst for my making my own side rounds. Thanks again brother for all that you mean to this community and for the treasury of memories your laying up in future generations as you planes and knowledge will long out live us all.
V/R, Shannon