Thursday, November 29, 2018

An Introduction to Ovular and Elliptical Shapes with Hollows and Rounds

(The gist of this post was originally posted in December, 2010. Changes have been made.)

The holidays are coming up. I am (was) conveniently making a few picture frames as gifts. The presents are technically what's inside the frame, but those subjects are not the purpose of these posts.


I am often asked what pair of hollows and rounds a woodworker should start with. The answer, like most things, is that "it depends." I imagine that the 4s, 6s and 8swill have their place in everybody's work (radii of 4/16, 6/16 and 8/16, respectively). This advise, of course, doesn't help somebody that's looking for only one pair.

My recommendation for getting started is as follows: if you want one pair of hollows and rounds then pick an ogee that you like and I'll help you pick a pair to make it. (Fortunately, that same pair will likely fit into your shop well.)

These 30 profiles were all made with the same two planes, a single pair of 6s.

If, however, you have the option, then get two pairs. With a second pair you will be able to make much more than twice as much than what is photographed above. You'll be able to make exponentially more profiles, in fact. You will be able to make all of the same profiles above, but in varying sizes.

These four ogees are geometrically similar: each consists of two circle segments that are 60 degrees of an arc. Each profile is 30 degrees from horizontal. From left to right, they were made with a pair of 10s, 6s, 4s and 2s.

With a second pair, you will also be able to mix and match the hollows of one size with the rounds of your other to make profiles more representative of what you see in period work.

The profile above is 90 degrees of a 1/4" convex radius and 60 degrees of a 3/8" convex.

Additionally, you'll be able to introduce ovular shapes by using two rounds or two hollows together, which is actually the subject of this post.

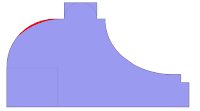
The large cove of the profile on the left of each of these pictures was made with a single round and is a circle segment. The profile on the right was made with two rounds and is more elliptical. 

It is at this stage, having multiple sizes, that you will truly be able to recognize the versatility that these planes both allow and encourage. Get the 4s and 8s or the 6s and 10s and you'll be able to make scores of complimentary profiles. (Will you want 5s or 16s next? Rest assured that you will know.)

With ovular shapes, all planes are still being guided by the rabbets and chamfers previously touched upon. Steering them is not freehand, but at times it will feel like it is if you do not have a proper strategy.
Take note that the Ovolo on the left and Cove on the right are each made with multiple planes, mimicking an elliptical shape.


Rabbets and chamfers will guide these planes in that same manner we have touched upon before.


Separate the transition points of each plane's future profile with the vertex of a rabbet (Round to hollow, hollow to round, round to round, etc.).


Then create the guide for each round with a rabbet whose vertices approximate the angle of the following cove. (Take note of  the dimensions of the rabbets guiding the rounds in the second picture above.)

#6 round followed by #10 round.

#6 round followed by #10 round


-Or-


Do you see how the rabbets are actually guiding the round?


Chamfer with rabbet plane


#6 hollow followed by #10 hollow


Finally use a rabbet plane for the chamfer followed by #2 hollow.


Look at the result 1-2 passes from completion below.


These picture frame profiles often look a little weird to my eyes (see above). Once they're mitered they are pretty complimentary (see below).


Ovular shapes are seemingly more difficult to lay out at first because it is not always obvious where the necessary guiding rabbets belong. The process is not apparently straight forward. Try a couple picture frames like this and you'll know your error(s) about 20% of the way through. Ultimately, know that you don't need perfect results with either your practice pieces/Christmas presents because you'll be getting socks or Tabasco Sauce in return, which is ideal.


Note: a profile like this is worked from both sides. You'll need straight grain or a scraper.

P.S. It may feel like we're jumping all over the place. By seeing more complex profiles you'll start to piece the generic process together on your own. We'll get to the basics in the coming weeks and the basic process will then be evident.

Just think about the following: How do the rabbets act as depth gauges? How do the planes, themselves, act as depth gauges?

Tuesday, November 20, 2018

A Fresh Start with Hollows and Rounds

Hollows and rounds are seemingly difficult to steer, especially if you have the wrong strategy. If a profiled plane has a single point for its contoured sole to ride, the chance that you end up with the beginning of 7' molding equaling the end is slim. The chance of the beginning equaling the ending and equaling what you want? Good Luck!


Hollows and rounds shall be steered by giving each plane two points to ride upon, instead of just one.

Let the rabbets and chamfers dictate the direction that the planes are presented.


Changing the dimensions of the guiding principal, a rabbet for a round and a chamfer for the hollow, shall change the final product.

*Take note that the rounds are guided by the two tips of a rabbet. The hollows are guided by the two edges of a chamfer. 

Let's look at some real-life examples now.

Do you want an ovolo at 30 degrees? One hollow? One chamfer at 30 degrees.

(Note: the vertical and horizontal fillets are defined by rabbets)

Do you want a cove at 30 degrees? one round? The arrises of the guiding rabbet shall be at 30 degrees.

An ogee at 30 degrees? one hollow and one round--one 30-degree chamfered rabbet for the hollow, the arrises of a single rabbet for the round, also at 30 degrees.


An ogee at 45 degrees? Look at the differences in the rabbets below vs. above. Everything is laid out at 45 degrees here.

A reverse ogee at 30 degrees? Again, look at the different layout. Same tools, similar rabbets, different results.

Do you see any features above that you recognize from the previous two moldings (reverse ogee and astragal, cove and ovolo) at which we looked?

Additionally, look at how much material is being removed by the profiled planes in the perfect world of Google’s Sketch-Up. It's minimal.

Next week we'll specifically look at how rabbets serve as a depth gauge.

One last thing: I am not the person to speak to regarding design. I am a copycat when it comes to my craft. This is the reason I bought my first antique planes--to copy. Anybody looking for elements regarding design should check out Lie-Nielsen's library. I've heard very good things about a few of their dvds, including those by Don McConnell, Larry Williams and George Walker. They are each extraordinarily knowledgeable in the subject.

Thursday, November 15, 2018

How to Use a Rabbet Plane

(This post was originally published in December, 2010. Few changes have been made.)
There are many ways to make a rabbets: moving fillister, plow/chisel, shoulder plane, table saw, etc. Know that you will need to be comfortable with, at least, one of these methods to use hollows and rounds successfully. I often choose using only a rabbet plane for most of the moldings I make. 

A rabbet plane is an easy plane to set up. There are no depth stops and no fences, which is an enormous advantage. A rabbet plane is the single tool you will use for adding all rabbets and chamfers that we've previously seen.
An unfenced rabbet is ideal for what we'll be discussing. It's the difference between one tool and two.
How does one go about making such a rabbet?


The luxury of this demonstrated process is that when it comes to cutting the 2nd rabbet or 7th, there is nothing to adjust. You only need to mark the rabbet with your gauge.

Tuesday, November 13, 2018

A Step-By-Step Illustration of Hollow & Rounds

(This article was originally published in December, 2010. Few changes have been made)

Let us look at the process of creating the base moulding of Glen Huey's feature article in the most recent issue (actually, 2010) of Popular Woodworking: A cove and Ovolo.


The first steps involve the rabbet plane:


 The next steps include the proper hollows and rounds:

#6 Round making 60 degrees of an arc

#4 Hollow making 90 degrees of an arc

This is the final product:


There are only two arcs, so there are just two profiled planes used along with the rabbet.

If laid out ideally, you will be using the #6 round until it takes a single full width shaving, no more.

The #4 is slightly more tricky. You'll have to hold the plane at different angles in subsequent passes as you make 90 degrees of an arc. You'll know when you've taken one too many passes with this plane because you'll leave plane tracks with both corners. Stop one pass before that...seriously.
(Note: the #6 round was also used in this same piece's previous profile, do you see it? Hollows and rounds do not cut specific profiles. They cut specific arcs. This is why we're able to do so much with just one pair.)


Reading these post will leave you with many unanswered questions:
Why do we start with rabbets?
Why are there chamfers sometimes?
How do I know when to stop?
How is it all laid out? Why?

Answer: Hollows and rounds have no depth stops and no fences but they're only seemingly difficult to steer.

We're just getting started.

Tuesday, November 6, 2018

A Justification for Hollows and Rounds

(This post was originally posted in December, 2010. Few substantial changes have been made, if any.)

The edges of furniture I made for 5 years were various derivatives of my same 12 router bits. Every time I thought about my next piece, I immediately thought about the various profiles involved and the methods I would choose to replicate them: “How will I get close?” “How will I have to change the profile to fit my tooling?” “How much will a new router bit cost?” Inevitably, “which router bit of the 5000 offered is closest to what I want?”

I hosted a booth at a Lie-Nielsen Handtool Event this past weekend (2010) at Phil Lowe’s Furniture Institute of Massachusetts (*Note: I will be at another Lie-Nielsen Handtool Event at FIM in early December of this year*). I again fielded a question regarding the planes I offer and was faced with a similar question of this seemingly recognizable struggle of molding profiles.

I suggested hollows and rounds as an option and was told that a router can do the same thing.

Here is what a router cannot do:

I had an issue of Popular Woodworking on my bench and asked a fellow woodworker to pick out a profile in the pages. We settled on the support profile beneath the chest of drawers’ top in the feature article: a reverse ogee and astragal. I asked the gentleman how he would produce the profile in his shop, he responded about how he would mimic the profile to get something close.


With hollows and rounds, we had the profile complete before the end of our conversation, not a derivative, not something that will work as well, not another swipe of the credit card followed by 3 day delivery. We were done.


I used a rabbet, a #6 hollow and round, a snipes bill and a #2 hollow. Here are the steps I took.


I have a list of reasons why hollows and rounds are appropriate in today’s shop. The reason why they are in mine is because they let me do anything. They end tooling. They end compromises. Hollows and rounds start true creativity and control.

Monday, November 5, 2018

This Blog, Musings From Big Pink and MSBickford.com

Approximately 13 years ago I put my name on Larry Williams' backlog, expecting delivery of planes only 11 years ago.

Approximately 12 years ago Larry Williams produced a dvd regarding making side escapement planes. As a result, I made my own. I posted pictures of those planes online and quickly received a congratulatory phone call from Larry, who I never spoke to before. He questioned if he could a) ask general questions about my experience following his instruction, b) sell me the rabbet plane that he previously convinced me to purchase vs. the moving fillester that I thought I wanted, and c) take me off his seemingly never-ending backlog.

A few years later, and with Larry's consent, I started pursuing customers while making faithful reproductions of Larry's faithful reproductions. I quickly recognized that interest in these tools could be fantastic while familiarity with them was negligible. Knowledge must be built.


My blog was started for those that knew nothing about hollows, rounds and the other supplemental planes. I started my blog in an effort to explain order to my customers while also establishing it for myself. I started this run-on blog as an effort to put my own, personal success with these tools into a translatable series of steps.


After many blog posts and minor successes I was offered the opportunity to write a book for a brand new publishing company, Lost Art Press. I had the writing bug and happily agreed.

The meandering explanations of this blog were the start of that book. This blog was my beginning. These paragraphs created my first true customers and these written words established my few woodworking credentials. This running blog, however, always assumed that you were here from its beginning--growing in your interest as I grew in my explanations. 

I have always imagined my blog being viewed chronologically from the first post through the most recent. Call me 'juvenile' or 'old-fashioned,' but starting at the beginning doesn't seem to happen today because there's no obvious reason to start there.

As a result, I believe that reposting several entries of my past has value, other than lazily integrating past sentences and explanations onto my new website.

Without further ado, stay tuned.