Friday, December 31, 2010

Vacation is OVER

I've been away from the shop for several days. Even when I'm away I find it hard to escape.
True Story: the very last crossword puzzle I did before this one was on a Southwest flight back from a Lie-Nielsen event in San Diego. (I am certain that I was the only person traveling with a checked bag full of poplar offcuts and another full of 30 sharp blades and a can of WD-40.) One of the clues was 'Planes, for example'. 5 letters. I had '-oo-s', but wasn't certain about the second 'o'. The ride was coming to an end and I had to look at the answer key...'TOOLS'. I didn't get it. My wife laughed in my face when I told her. I had 30+ of them in my luggage but I was on an airPLANE and I couldn't separate the two. I hate crossword puzzles. I'm just glad nobody knew. 

-------------------------

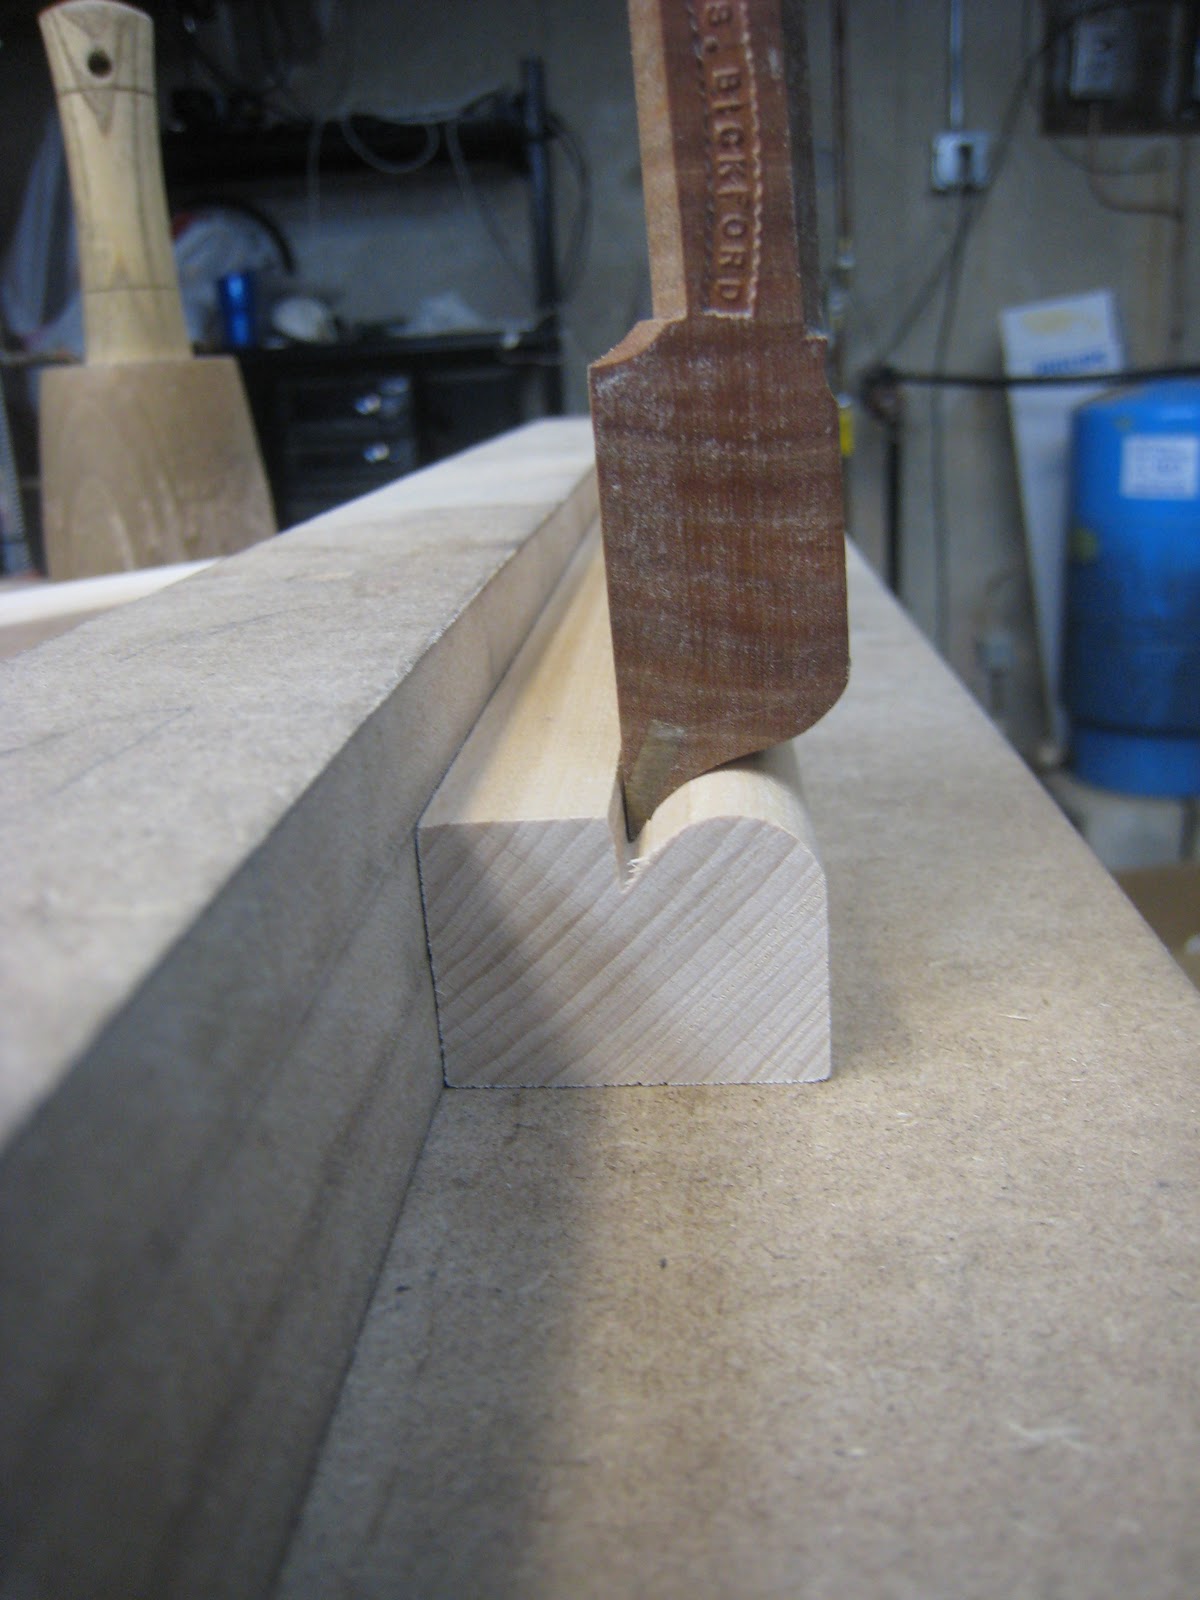
There is often discussion of new planes vs. old. Let me make an argument for the old. They are out there. They are cheap. The hollows and rounds are nearly all serviceable. Here is a picture of my first #4 hollow.
The body was warped SIGnificantly. Let me rephrase that: the body was warped SIGNIFICANTLY, probably 3/32". It works now. It cuts a 1/4" radius, but nowhere near 60 degrees.

In fact, all of the soles (matching pairs) in my original set needed to be addressed. Even the matched ones in G+ - G++ didn't come true. But that should be expected.
When profiled planes do have a true sole expect that the iron needs to be reshaped, not just resharpened. I have never purchased a profiled plane that only needs resharpening. These planes have been used properly for a few working generations and then sat or were mishandled for a century or more. 

But they can work again. Don't let it stop you. Put your hand to the tool and then to your work. Whether you're using hollows and rounds to get from A to Z like I show you, from M to Z by altering your various shaper knives to get exactly what you want, or Y to Z to get rid of machine marks, you will be fulfilled. Put your hand to your work. 

Do you not know where to begin? Get Larry Williams DVD Making Traditional Side Escapement Planes. There is so much information in there that you could nearly start your own business. Well, you couldn't, but...

----------------------------

1996 is nearly over. I've been pursuing customers for 9 months now and am wrapping up my first (abridged) year. Somewhere in the picture below is plane #400.
Woodworkers, and mugals alike (I swear I never read Harry Potter and that wand is definitely not mine), often hint at the idea of an impending boredom in making planes everyday. There are a few things that keep me going.
1. Wood is awesome and sometimes it all comes together perfectly

2. I make the most versatile product at any exhibition.
3. I make people realize I make the most versatile product at any exhibition, though they might not realize this for a year or two. (I will be at the Lie-Nielsen show in Brooklyn, NY on Jan 7-8 where I always get a run for my money.)
4. Every plane I send out is better than the ones that I have. (and I have nearly 100 that I have made)
(not the ones on the bottom)

5. I have a stable of about 30 albums that I've been listening to for 15 years of which I canNOT get enough.

So here's to 1997...My resolution is to prove all of this to you. Thank you for reading.


Wait, what year is it?


Thursday, December 23, 2010

Sizing up the Competition

I went down to my friends' shop, Don and Chris Boule of Boule Cabinetmakers, to wish them a merry Christmas. Don's work was my introduction to woodworking. I've spent numerous weeks in his shop. His fully self-furnished living room is my goal.

Don and Chris are also the reason I have a deadline for the dressing table on which I'm working. The three of us will be bringing our work up to Saratoga, NY in March for the NWA Showcase, where I will also be hosting a booth to showcase my planes with Raney of Daed Toolworks.

When I was at their shop I talked my way into their house. I was finally able to see the two completed pieces that they will be bringing up for the contest.

Don will be bringing a newly completed tea table:
(Don built his house. You can tell a woodworker lives there by the floor boards, which I didn't notice until I was going through the pictures at home. Nice touch Don!)


Chris, Don's son, will be bringing a scaled highboy: I'll let the pictures speak for themselves. Just wait until you see this thing in person!


Here are a few snapshots of a highboy Don made several years ago. It's classic Dunlap. (Note: Don was actually trained by Donald Dunlap, of Dunlap lineage.)

Please excuse the picture quality, they offered to move the pieces from the glare coming in but I declined.

I'll get back to work now.

Wednesday, December 22, 2010

Snipes Bill Planes: an introduction

Snipes bill planes are very specific planes. If you want to do everything, like side rounds they are a necessary weapon.

Hollows and rounds cut 60 degrees of a circle. Snipes bill planes cut nearly 90 degrees, and a different portion.

Much of the time I only use the tip of the plane (red) to inset a quirk, but a full width shaving can certainly be taken (red and green).
Let's look at a few examples of quirks being inset.
 Why are these planes needed in these profiles vs. just setting the profile in with a hollow?
A hollow just won't reach in some cases. Additionally, a hollow is designed to cut the circumference of a circle where as a snipes bill is designed to cut both the circumference and the adjoining fillet.
Do you need various sized snipes bills like you need various sized hollows? The answer is probably not, unless your work is very specific. You certainly will not need as many. I have never desired one larger or smaller than the standard size that I offer, which cuts a 5/8" radius circle. 

The single size is not at all limiting. The side bead above is 3/4" diameter, below is 1/2" and 1/8".
After insetting the quirk you will shape as much as you can with various hollows. You will be able to reach nearly 150 degrees of the total, making a very acceptable bead. Are the results perfect? no, but the non-concentric circles they create (which are evident in the first side bead) will not be apparent in any view other than the cross section of the profile.

Why do snipes bill planes come in pairs? These planes do not travel well against the grain. (In fact, many times woodworkers have issues with these planes it is because they're going the wrong way or have chosen wavy grained wood that has no right way.) There are times, as can be seen above, that you'll want the profile the snipes bill creates facing a different direction.
If you were to use the snipes bills to create this linen fold, for example, (which is not necessarily recommended) you do not have the luxury of just turning your piece around and going back on the other side. You have to attack your work from the same direction.

Sometimes the snipes bill plane has nothing to do with the profile. Look again at these two

The profile of the plane has nothing to do with the finished profile. They're used simply to create a void for the hollow to enter. The profile you see is from the hollow, not the snipes bill. A hollow can't reach and cannot cut a fillet.

I know what you're thinking now. "If the profile isn't necessary, just the ability to inset a vertical quirk, What else can it do?" Due to the significant research at Clark & Williams we have been reintroduced to a wonderfully easy way of starting rabbets in square and non-square stock. One of the added extra advantages of snipes bill planes is that they introduce an easy method for starting rabbets in square stock. The plane stays in the gauge line with almost no effort while starting to define the fillet for the rabbet to follow.

I believe Don McConnell of Old Street Tool, Inc. demonstrates starting a rabbet in non-square stock in Traditional Molding Techniques: Cornice Molding. Snipes bill planes excel here.
In square stock this method is nearly fool proof, I could almost guarantee you'd be successful on your first try in non square stock, it's simple.

Using only a rabbet plane in this situation is very difficult because the rabbets are often inset far enough that you can't use your fingers as a fence. Moving fillisters, plow planes and fastening a batten down here will not work.


Is a pair of snipes bill planes necessary? After all the new ones are expensive and the old ones can't be found. They're only necessary if you like what you see above: profiles being next to profiles, quirks, shadows and working with non square stock.

----------------------

And here's the handle of my nephew's new Harry Potter wand. The story says that he has the feather of a phoenix in his wand...so I'm told.

 It's the first time I carved anything in the round. I was pretty excited that I didn't stab myself with a gouge while I was setting it in; the futures in Vegas were trading pretty high.

My middle son, Thaddeus, thinks it looks like his electric toothbrush.

Tuesday, December 21, 2010

Potpourri

1.
I got a call this afternoon from a friend who is a contractor in our town. He's doing some work at a farm house and couldn't find a matching molding at any of the local places. (Each is probably 15 minutes apart and 20 from our small town.) "Can you do it?" "Yes, bring it over" "it's a quarter rou..." "Just bring it over."
20 minutes later...done.
2. 
I was asked about boxing. This is how I start a pair of snipes bill planes. Table saw kerf with the plane standing up. Lay the blank on its side and add the shoulder. Fit the boxing with planes. 
I've been told that it's pretty impressive that I can do this with planes. I'd be more impressed if you could do this with machinery. Planes are easy.

3. 
Finally, carving this amount really tests your attention span and patience. There is still quite a bit to do with these two legs, not to mention the front pair. 
I completed a pair of side chairs a couple years ago. I cannot imagine doing an entire set.
The end of March is getting closer.

Monday, December 20, 2010

Working Backwards: cove and ovolo

Here's our goal:
Two profiles. One is 60 degrees of a concave circle with a radius of 6/16ths and the other is 90 degrees of a convex circle and has a radius of 4/16ths. We will use a 6 round and 4 hollow.
Let's remember what we've learned: a concave portion will begin with the tips of two fillets for the round to follow. Every convex portion will begin with 1 chamfered rabbet for the hollow to follow. Looking at the above profile there is one of each. We know that we'll need three rabbets. I hope the location of the first two are somewhat apparent.
Now we need to find where the third goes. The arc is 60 degrees of a circle so we know that the bottom of the rabbet needs to be on the circumference of the profile. We also know that the tips of the rabbets need to be parallel to the angle of the profile. There's only one solution.
And that's our third rabbet
Finally we have to figure out the chamfer. Remember, it needs to be parallel to the profile and on the profile.
Do you want to make a reverse ogee with a fillet? Reduce the depth of the red rabbet until the convex meets the concave.
Do you want to get rid of the fillet on top? Get rid of the green rabbet.
Do you want to switch the profile to make an ovolo and cove? switch the rabbets. (this is weird looking)
Add a second fillet between the two? Increase the width of the purple rabbet. (Not so weird looking now.)


 Regular ogee? Reduce the depth of the purple and red rabbets in this image up two up.

I'll stop now.

Please remember, this is perfect world stuff. Accuracy increases consistency while decreasing steering and scraping.