Come share a day with people that share your interests in woodworking...because I doubt your wife does.
I will be set up at SAPFM's New England Chapter meeting this Saturday, 2/26. I will have a table full of planes to see, hold and try. The website states that preregistration is needed to "ensure admittance." You might still be able to sign up, I don't know but I think you should try...

Tuesday, February 22, 2011

Wednesday, February 16, 2011
Dunlap Tall Case Clock, Hollows, Rounds and a Trick for Crown Molding
This is going to be a good one, I promise...
Most of the time when using molding planes on square stock you want the grain leaning in this direction. (Starting at the top right and finishing on the bottom left.)

Most of the time when using molding planes on square stock you want the grain leaning in this direction. (Starting at the top right and finishing on the bottom left.)

This allows the planes to travel with the grain on both planes when planing at an angle.
When I work a larger crown I change my ideal grain to the following. (Again, traveling from the top right to bottom left.)
Monday, February 14, 2011
Nathan Liverant & Son Antiques
I find myself in antique stores quite often. My wife and I usually go to poke around. Every now and then we'll find a place that has a piece or two in which I'm interested. These pieces are always vintage reproductions, but still neat. Nineteen out of twenty times I'm disappointed. I usually end up poking around the toys with my kids or the tools while I fend them off.
A month or two ago we went to an establishment that looked promising from the outside, Nathan Liverant & Son Antiques. They were closed but I was able to peek in the window. I saw a silhouette of a windsor high chair and 'promising from the outside' turned into 'potentially perfect.' I knew that I'd return. I knew I'd be happy. I knew that the kids would need a baby sitter.

This weekend we did return without the kids. It took us about twenty minutes to get out of the entry foyer of this 1835 Baptist meeting house-turned-early-Americana gem and onto the main floor. There was so much that caught my eye. Every step displayed something that was perfectly in line with my interests on the floor, on the surface and on the wall.
A month or two ago we went to an establishment that looked promising from the outside, Nathan Liverant & Son Antiques. They were closed but I was able to peek in the window. I saw a silhouette of a windsor high chair and 'promising from the outside' turned into 'potentially perfect.' I knew that I'd return. I knew I'd be happy. I knew that the kids would need a baby sitter.

This weekend we did return without the kids. It took us about twenty minutes to get out of the entry foyer of this 1835 Baptist meeting house-turned-early-Americana gem and onto the main floor. There was so much that caught my eye. Every step displayed something that was perfectly in line with my interests on the floor, on the surface and on the wall.
Friday, February 11, 2011
Queen Anne Side Chair: Shoe
I finished a pair of queen anne side chairs a few years ago. This project is a perfect example of the versatility allowed by hollows and rounds: Two chairs, two shoes, 16" of finished molding, one molding profile I will probably never make again, an hour to completion, no new tools.


Plow plane (or Table saw) followed by rabbet (or table saw)


Rabbet followed by Rabbet. Why the chamfer?
Tuesday, February 1, 2011
John Townsend Table Edge, Support Molding, Hollows & Rounds
I have been speaking to a customer that is in the process of producing John Townsend's famous chest.


He has asked for direction and tooling in regards to the table's edge and support molding. He sent drawings of the two profiles. (Apparently he is building one along side a friend. The drawings were executed by his friend and have bearing locations illustrated for a shaper cutter. I wonder who will be done with the molding first--me or the friend?)
Table's edge

Rabbet Plane

The Radius listed was 17/32". I got it close with a #8 (8/16 or 16/32") and then free handed a couple passes until I was near the profile I drew on both ends. Any slight facets can be scraped out.

Rabbet

The radius listed was 5/32". I got it close with a #4 (4/16 or 8/32). Again, facets will need to be scraped here. (we're talked 3 minutes with a scraper.)

Support Molding


Friday, January 28, 2011
Making Basic Shapes with a #6 Hollow and #6 Round
Chris Schwarz addressed the oft asked question "how do I get started in hand tool woodworking?" today on his blog. My transition to hand tools started with dovetails. My move to planes happened in a cry for 'mercy'. I had a six inch jointer and wanted an 8. I read how everybody that had an 8 wanted a 12 and everybody that had a 12 wished they had, at times, an 18. If the person answering had a 24" planer you don't want to know for what they yearned. I bought a couple stanleys and a ridiculous pink workbench instead of chasing that high and have never wished for a wider jointer since.
For many hobbyists hand planes are a strangely logical solution. My decision was not a fulfillment of a secret desire to live centuries ago. Using hand planes for flattening a single side before running it through my planer was based only in practicality. I imagine hand planes are practical in most shops, but to varying degrees.
I never get asked Chris' question. I often feel like I am the last step. Like a try and a fore plane, however, hollows and rounds are relevant and a strangely logical solution to many hobbyists journey and craft. The solution they offer--flexibility--is practical; the means by which they offer it--putting your hand to your work--is wonderful.
A few weeks ago I posted a couple entries detailing several things that can be done with only a #6 hollow or a #6 round. Let us take a quick look at what can be done with a single pair in combination.


 +
+


 +
+


 +
+


 +
+


 +
+


 +
+


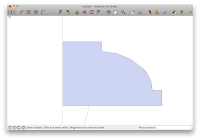 +
+


 +
+


For many hobbyists hand planes are a strangely logical solution. My decision was not a fulfillment of a secret desire to live centuries ago. Using hand planes for flattening a single side before running it through my planer was based only in practicality. I imagine hand planes are practical in most shops, but to varying degrees.
My transition to molding planes occurred in a similar cry for 'mercy.' I was looking through Amana's web page trying to find something specific and ended up dropping $85 on a compromise.
I never get asked Chris' question. I often feel like I am the last step. Like a try and a fore plane, however, hollows and rounds are relevant and a strangely logical solution to many hobbyists journey and craft. The solution they offer--flexibility--is practical; the means by which they offer it--putting your hand to your work--is wonderful.
A few weeks ago I posted a couple entries detailing several things that can be done with only a #6 hollow or a #6 round. Let us take a quick look at what can be done with a single pair in combination.


Ogee (60 degree circle segments at 30 degrees) with Fillet
 +
+
=


Ogee (60 degree circle segments at 60 degrees) with Fillet
 +
+
=


Ogee (90 degree circle segments) with fillet
 +
+
=


(disregard the quirk)
Reverse Ogee
 +
+
=


Ovolo and Cove
 +
+
=


90 degree Cove and Ovolo
 +
+
=


(60 degree ovularish) Cove and (90 degree) Ovolo
 +
+
=


Or would you like the oval the other way?
 +
+


etc., etc., ETC!...
That's 27 different profiles illustrated that can be created with one hollow and/or one round.
We've looked at making rabbets
We've looked at steering planes with rabbets
We've looked at using rabbets as depth gauges.
We've looked at laying these shapes out before.
Stay tuned. We'll take a look at what can be done with two pairs. You'll see why I always recommend starting with more pairs than one: we can probably come up with 100 profiles with just 2 pairs.
We'll also execute the supporting molding and top edge of the John Townsend chest in the Metropolitan Museum of Arts with no new tooling, no real compromises and a few work-arounds.
Clearly, it's pretty difficult to keep up with a router.
Subscribe to:
Posts (Atom)